PBR also known as Physically Based Rendering is a texture workflow that aims to simulate how light reacts with a model to attempt to simulate real life materials.
While it does a great job of simulating materials its biggest upside is it has introduced a standardised methodology of texturing 3d models so regardless of what programs you use to render it will react consistently to lighting.
PBR is widely used in most 3d Software and in Game Engines including Unreal Engine & Unity and is a workflow that is being widely accepted in the CG industry.
Why Should You Use PBR
Previous to the introduction of PBR most render engines had their own workflows to attempt to replicate the same effect. The main downside is if you decided to go from Blender to Unity for instance there were extra steps involved using shaders. This created extra work and it wasn’t an exact science.
With the introduction of PBR and the aid of awesome software such as Substance Painter creating materials using a PBR workflow has never been easier. It is dumbed down so much in fact, as 3d artist you can get by without needing to know much of the technical side. However if you are interested I’d recommend this article in some of the training material Substance Painter has produced.
PBR is more or less an industry standard, so as an artist it is in your best interest to learn how to work with it. Believe me when I say my first experience with it blew my mind, and it really gave me a lot of perspective and appreciation for textures and the people who came up with it.
What Are the Different Workflows
When working with a PBR workflow there are actually 2 different workflows there is the Metallic Roughness workflow and the Specular Glossiness workflow. Both give the same result and most render engines will support both including the big game engines.
I personally like the Metallic Roughness as logic behind it makes the most sense to me when conceptualising how I want a material to look and I find it is most commonly used in all the 3d software I use.
Metallic Roughness
The Metallic Roughness model consists of 3 channels. These are Base Color, Roughness Metallic. The theory is once all of these are combined they can simulate how light reflects off most materials. These channels are then combined into texture maps to be used in render engines. Below is a breakdown of how each of the channels work.
Base Color
The base color simply that it holds all the color information and no lighting information.
Metallic
This simply dictates if the material is metallic or not or somewhere in between.
Roughness
This channel dictates how much light is absorbed if it is set to 100% then it appears rough and 0% really smooth and shiny.
While this seems live a very simplistic approach it is surprising how well it works. The varying textures combined with finer detail you could simulate most materials. Further in this article I will demonstrate this in practice.
Specular Glossiness
The Specular Glossiness workflow once again consists of 3 Channel. It has a Diffuse (Albedo), Glossiness, Specular and Normal. This is where it can get a bit confusing. The channels work as follows.
Diffuse (Albedo)
This channel differs slightly from the Base Color channel in the Metallic Roughness workflow. It does not contain color values for the reflectiveness of metals.
Specular
This works similar to the Metallic channel with the main difference your are able to adjust the color of the reflectiveness of the metal.
Glossiness
This is very similar to roughness but the values are inverted so at 100% it appears glossy and at 0% it is rough. You can simply invert the map and turn it into a roughness map.
Which Should You Use
This decision can be dictated by the render engine but given an option personally I find Specular Glossiness a little more confusing and have not used it too extensively.
Its benefit is it can give you more control over the reflectivity of the metal surface. This is turn can give materials a more realistic feel. Its main downside is it can be more memory intensive as the specular map requires an additional color channel to the base color.
Using both workflows I have noticed very little difference between the two. As I mentioned above Metallic Roughness is more user friendly and easier to understand, however this is just my opinion.
How Can We Implement a PBR Workflow
There are many programs that you can use to do this but by far the most popular is Substance Painter. It has become more and more industry standard.
It is exceptionally easy to use and it can easily switch between Metallic Roughness & Specular Glossiness workflow regardless of which workflow you textured in. Best yet it comes with the preset maps you will need for the various render engines including game engines.
Example
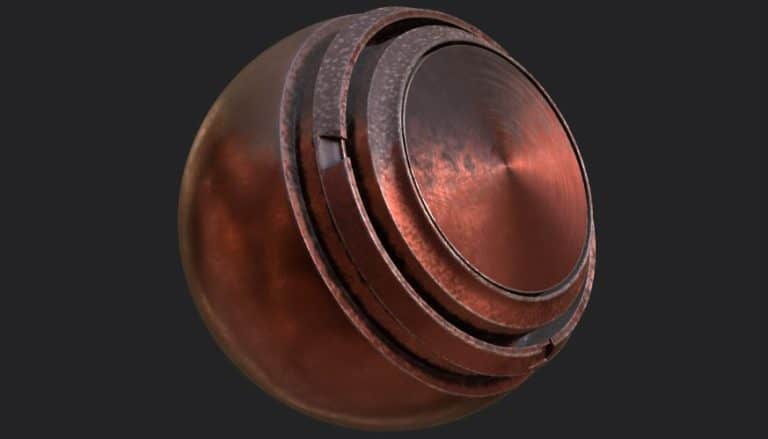
In this example we are going to use the Demo Sphere that comes with Substance Painter. Currently it is just a base mesh with no texturing information.

For the purpose of this example we are going to have a metal exterior and the middle will be Fabric. I’m going to achieve this by using a Metallic Roughness Workflow. This is not the most elegant art example but more to explain the principle.

There are a few settings for the metal exterior to achieve its grainy look, but what I want to draw your attention to is the setting of the maps.
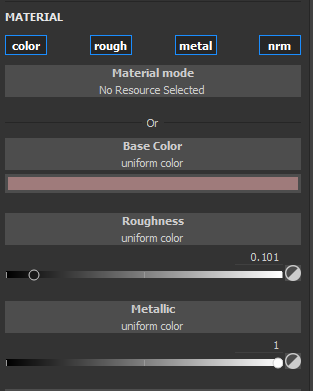
As you can see we have reduced Roughness to give it a shine and Metallic is at 1 (100%)
In regards to the fabric once again there are some additional textures causing the patterns but this combined with the Metallic Roughness workflow gives the appearance of material. Below are the settings that achieve this.

As you would expect Roughness is at max preventing and reflectivity and because it is not metal Metallic is a nil.
PBR really is a fun workflow and the results you can get are extremely easy to achieve.
To take it further if I then want to export this to Unity for instance it is really easy. I simply select export textures. Select Unity 5 (Standard Metallic).

Choose texture resolution and hit export.
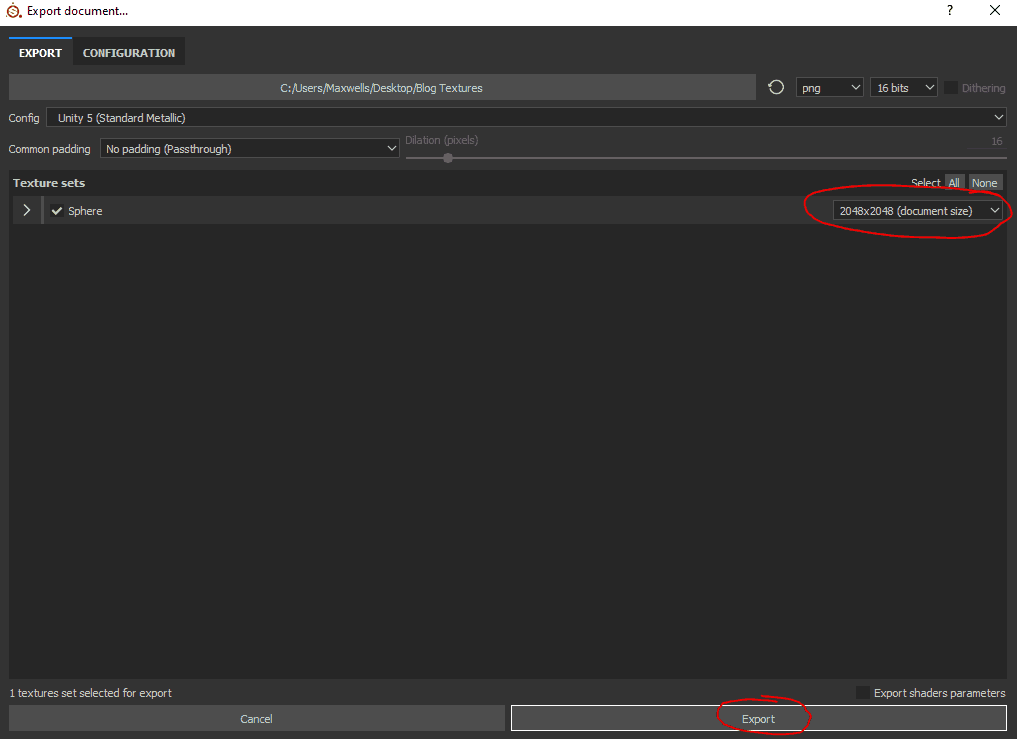
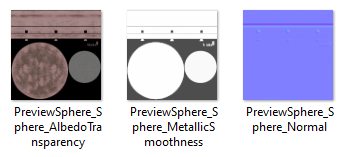
It then does its thing and gives you all the textures you need in the format you need for Unity 5 Engine.
Conclusion
Hopefully you now have an understanding of the power of PBR and realise it really is not as scary as it seems. This is just a brief synopsis and there is a lot more that can be done with it and I encourage you to go learn and practice as it is one of my favourite parts of the 3d art creation processes.