When first using Substance Painter it can be a daunting task as it requires some preparation of your model so as to best utilize its procedural nature. When combining this with a program such as Zbrush it can further confuse the matter.
In this article I hope to demonstrate the method I have found works and gets the best result using Zbrush in conjunction with Substance Painter.
The following steps are recommended to be undertaken in order to export a model from Zbrush to Substance Painter.
- Coloring Model to Identify Materials
- Grouping Subtools
- Check Your Models Orientation
- Create UV’s in Zbrush
- Exporting FBX from Zbrush
- Importing into Substance Painter
- Baking Texture Maps in Substance Painter
- Texturing Based on Imported Color
Example Summary
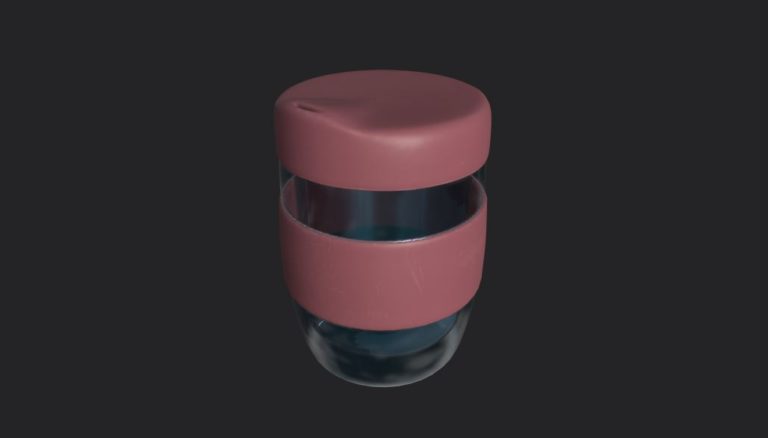
In this article I will be using the below mug I created as an example. The Mug has a High and Low Poly version with three subtools the lid, grip and cup.
Step 1 Coloring Model to Identify Materials
The first thing I would recommend you do is to color your High Poly version to identify the different materials. You do this because when you import into Substance Painter you can actually mask based on the models imported colors. This makes it extremely easy and quick to apply materials. I will cover how to do this in Substance Painter in step 8 below.
For our below example we will color the cup blue and the grip and lid yellow as they will both be made of rubber. The colors you choose are irrelevant and you can have as many as you like as long as they are different enough to tell apart.
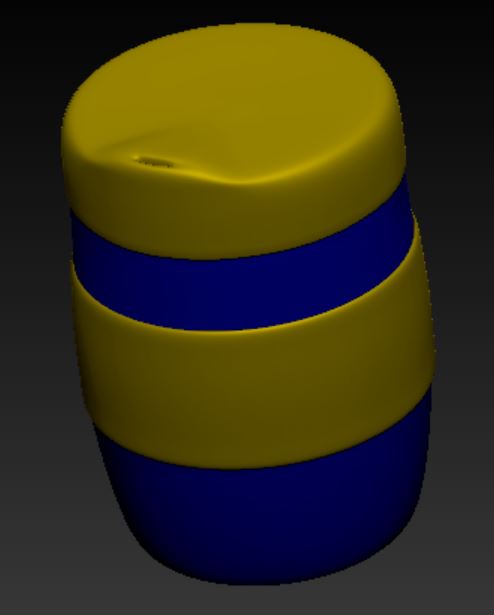
I know this looks a bit funky but I assure you the color is for reference purposes only and in no way affects the final texture result!
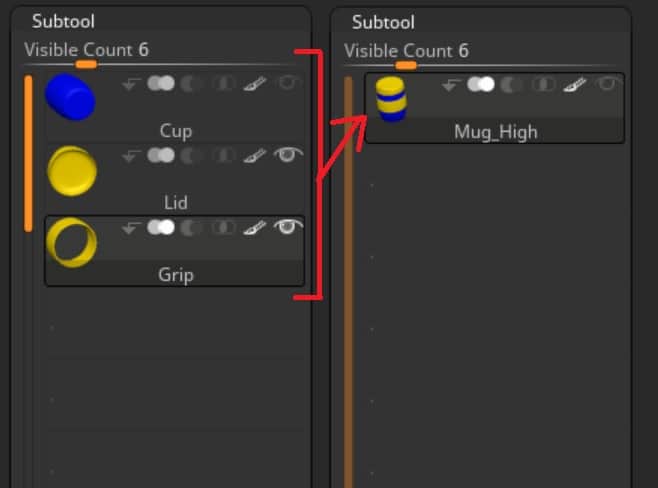
Step 2 Grouping Subtools
For each subtool you have Substance Painter will create a separate texture so it may be impractical to have 50 sets of textures. This may work fine if you are only planning to render in Substance Painter, but when you export to other render engines it will very quickly get chaotic.
For this example we are going to merge all subtools together so we only have the one Subtool. You have to do this to both the High & Low Poly versions.
Step 3 Check Your Models Orientation
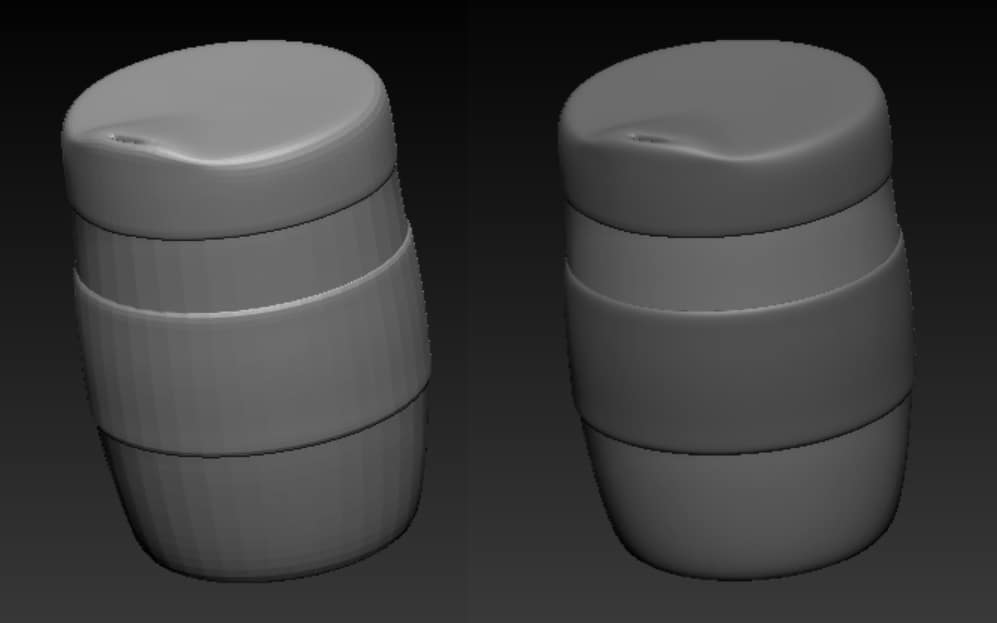
When you import your model into Substance Painter you are unable to rotate the orientation of your model. You will run into issues lighting your model, so you need to ensure you model is facing the correct way. To do this turn on the floor in Zbrush and check how your model is orientated compared to the floor.
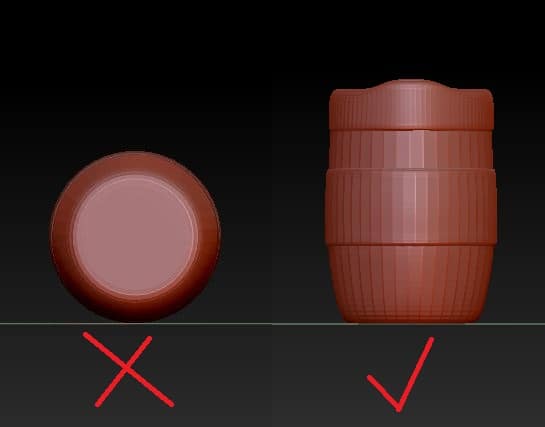
As you can see from the first picture the mug is horizontal to the floor this would not be ideal when imported into Substance Painter. In the second picture the mug is standing upright this is exactly what you need.
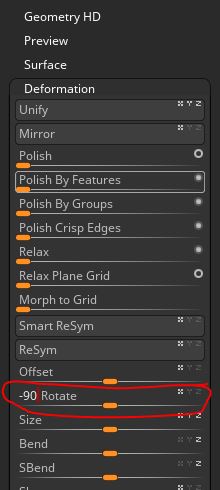
To fix this all you have to do is go to the Deformation menu on the right hand side and under Rotate select how to rotate your model. In this example I had to rotate my model -90 degrees on the x axis to correct.
Step 4 Creating UV’s in Zbrush
The next step is to create a UV map for your model. This only needs to be done on the Low Poly Version.
Personally at this point I usually take my model into a more robust program such as Blender as it gives you much more control over the seams and island placement of your UV.
For the purposes of this example we will simply use the UV Master Tool that comes with Zbrush. This tool allows you to have limited control over your UV, for instance you can paint to dictate where a seam should go.
To access UV Master go to ZPlugins in the menus up the top and then select UV Master. In this example we only have one subtool to unwrap and we are not to concerned about seam placement so all that is required is you simply hit Unwrap.

Once the Algorithm runs you should have a UV. You can check your UV by selecting flatten in the UV Master Tool
Important note remember to hit unflatten after you are satisfied with your UV. If you hit undo it will not revert the model back and undo your last action. If you export while model is flattened it will export a flattened version of your model.
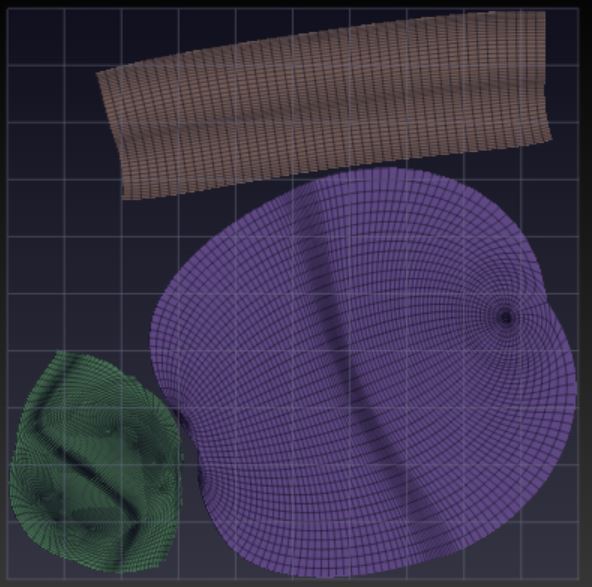
Below is an example of how the mug UV looks. As I mentioned not the most elegant UV but it will do the job.
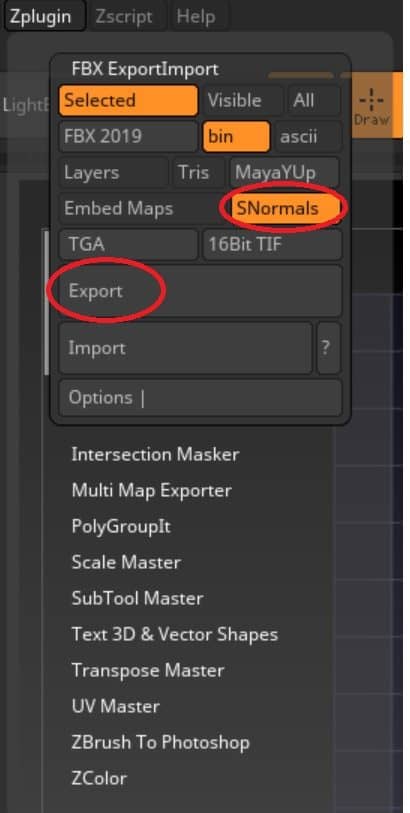
Step 5 Exporting FBX in Zbrush
This is all the preparation we need to do in Zbrush. Next we have to export the FBX of the High & Low Poly models. To do this we once again go to ZPlugin up the top and select FBX Export/Import. Since we have just the one subtool there isn’t much needed to change. If you had multiple subtools you would select visible.
One other option of importance is the sNormals button. This enables you to smooth the normals of your low poly mesh so as it appears less faceted. This can be useful, however if you are for instance going for a faceted type effect such as a low poly style I would not recommend this option. In this example we will leave it selected.
As I mentioned you need to do this for both the Low and High Poly models so you should have two files. In this case it will be one labelled “Mug Low Poly” & “Mug High Poly”.
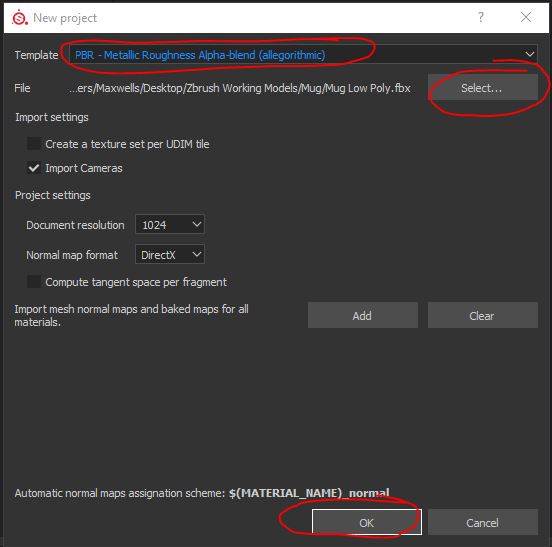
Step 6 Importing Into Substance Painter
Now that you have your High and Low Poly FBX files you can open up Substance Painter and import your model. Start by going to File then New. Select your Low Poly mesh from the file select option. Under template we are going to change this to use Metallic Roughness Alpha-Blend.
Normally I would choose just Metallic Roughness but because I am looking to utilize a transparent glass this particular workflow has a shader that allows it. Everything else I am going to leave as is and select OK
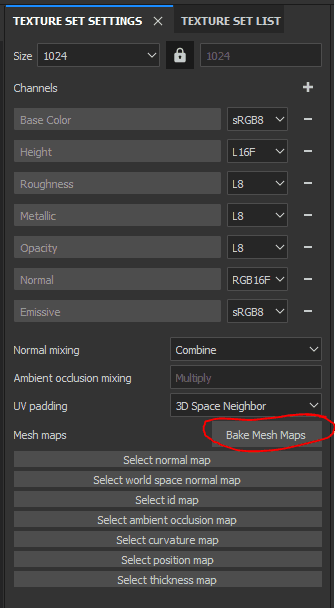
Step 7 Baking Texture Maps In Substance Painter
Next we are going to bake out texture maps using our High Poly mesh. You can do this by selecting the texture set list up on the top right hand side and selecting bake Mesh Maps.
For the purposes of this example we are not going to change any of the default settings and select the document icon to point to our high poly mesh. Select it and hit the bake button.
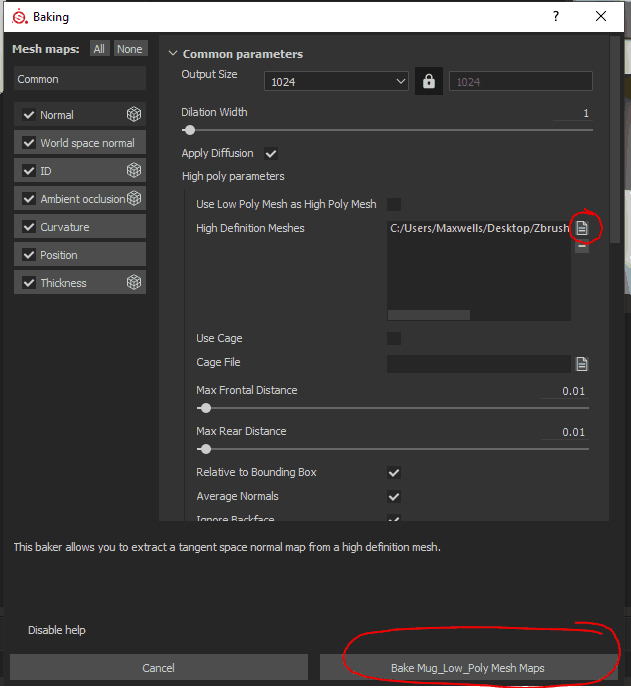
Substance Painter will now bake your maps and that is it you are now ready to texture your mesh!!
Step 8 Texturing Based on Imported Color
As I alluded to in step one you are able to quickly apply materials based on the imported color. To do this its easy apply a material to your model and right click on the material in the layers section on the right. Then simply select “Add mask with color Selection”.
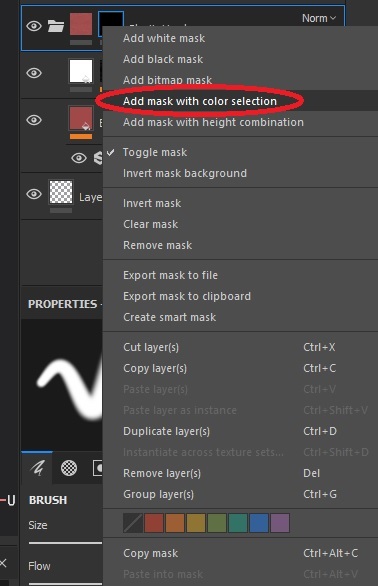
Once you select this you will have a new masking option appear Color Selection. Click this and then in properties choose pick color. Your model will change to the colors we selected in Zbrush. From here simply click on the color you want and it will mask accordingly.

I cant stress enough how useful this can be if setup correctly.
Conclusion
I hope you now have a firm understanding of how you can bring a model from Zbrush to Substance Painter. I have had the most success with this method however I encourage you to try others as there is always more then one way to do things.
This is only a few of the tricks in preparing your model for Substance Painter. I highly recommend you check out this article I wrote on 9 Tips for Preparing 3d Model for Substance Painter. It has some great tips on getting the most out of Substance Painter when preparing your model.
I hope you found this article helpful and has given you the confidence to try on your own project. Good luck and most importantly have fun.