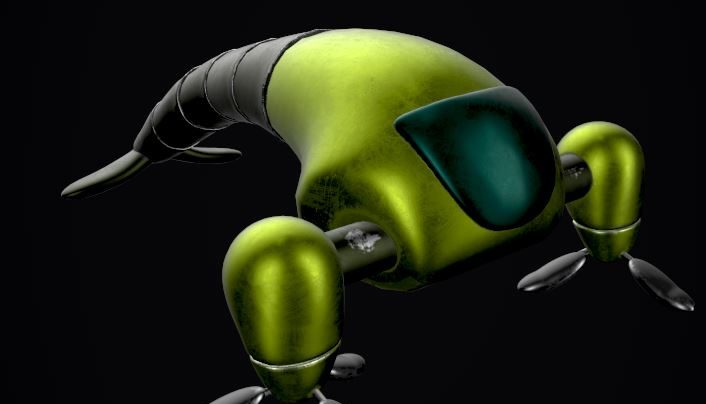
Substance Painter is in my opinion is the best tools for texturing 3d models, particularly in a PBR workflow.
The key to getting great results and quickly mostly comes down to the preparation of your model prior to commencing the texturing process in Substance Painter.
I’m in no way an expert texture artist, but from experience and learning the hard way the correct preparations can make a huge difference both in efficiency and quality of your texturing.
1. Creating Good UV’s
Good UV’s are essential when using Substance Painter. It can dramatically improve your efficiency and quality of your model. Some good practices include the following.
Utilising Texture Space
Ensuring your UV’s takes up as much of the texture space as possible will assist you with adding more detail to your model. This will also help if you are looking to reduce texture resolution, for example if you are looking to use the model for a game.
When preparing your UV give the parts of your model which require more detail a larger portion of the UV. This will enable you to give as much resolution as possible to the parts of your model that count.
Separating Islands
Having one type of material per island can improve your workflow as Substance Painter allows you to mask by island. This is a really useful feature and a little preparation before hand can save lots of time.
Do Not Overlap Islands
Unintentionally overlapping islands will not only make it difficult to texture your model it may make it impossible. Avoid this at all costs!! There is merit in intentionally doing it for example texturing multiple planks of wood to save texture space but ensure it is intentional.
Substance Painter actually has an automatic UV tool, which from what I’ve seen appears to work quite well. It places seams and unwraps your mesh. I haven’t personally tried this yet but it looks promising.
2. Painting Your Model to Identify Materials
Substance Painter allows you to mask based on an objects imported color. This can be useful to segment your model by different materials.
You can color all the metal parts of your model one color, all the rubber parts of your model another. It allows you to very quickly apply materials in substance painter and avoid to having to paint or select polys.
By doing this it allows you to quickly iterate and focus finer details that matter.
3. Create a Low and High Poly Version
This tip does not only just assist in Substance Painter. Having a High and Low poly version of your model is good practice.
Low poly models assist with your UV’s so you can place seams easily. It assists with deformation if you are looking to animate. Depending on what the model is going to be used for it might be essential, for example a game model.
Unless you have a top of the like desktop, most programs simply cant efficiently handle millions of polys.
4. Have Good Topology
Topology is essential in any pipeline and during the texturing process it is no different. Substance painter allows for so much more flexibility when you are able to select individual polys. It allows you to very easily mask off areas instead of having to rely on painting the mask.
Not only this it once again helps with your seams and Uv’s, so as to place and organise these best.
Many people including myself despise having to retopologize especially manually. However I strongly suggest you take the time to do this It can greatly improve your models including during the texturing process.
5. Always Export Using Fbx
FBX files have a lot more functionality then file types such as OBJ. OBJ are meant for static meshes so this means you cannot transfer animations or scene setups using these.
FBX files carry over a lot more information on a project. Probably one of the best features Substance Painter uses FBX files for is so you can import your cameras.
It can be quite handy having preset cameras setup to switch between while texturing. It enables you to quickly see how a model looks from various angles.
Substance Painter has Iray Render Engine built in to the software and imported cameras can work great for this. The Iray Engine updates in real time so it can be quite laggy to rotate the camera. Importing setup cameras can greatly help with this process.
6. Triangulate Your Mesh
This tip may be a bit debatable however I have had the best results doing this. Triangulating your mesh before you import helps keep a consistent result across render engines with your final textures.
This is because all render engines us an algorithm to triangulate the mesh before rendering it on screen. The problem with this is the algorithm can differ from engine to engine. Iray may split a quad one way while Blender Cycles might split it the other.
By triangulating before you texture this removes any guess work the different Render Engines do as they do not need to use their algorithms to triangulate.
If you are interested in reading up more about when to use Quads and Tris please refer to my blog post Guide to Quads, Tris and Ngons in 3d Modelling
7. Use Good Naming Conventions for Each Part
Substance Painter has a Normal Map baking tool and it comes in incredibly handy. This process can be sped up greatly when you don’t need to match each of your objects low poly to its high poly counterpart.
By default if you name each part with “_low” at the end of the low poly mesh and “_high” at the end of your high poly mesh Substance Painter will do the matching.
For example if you had a texture for an arm and a head. You would name the arm “arm_low” for the low poly & “arm_high” for the high poly. You would then do the same for the head and Substance will match them together.
Apart from being able to bake Normal Maps based on naming conventions it’s good practice to use names that make sense. Substance Painter uses the names to help you navigate and know which part of your model you are texturing during the texturing process.
8. Ensure Rotation is Correct
In Substance Painter the orientation of your model is set to the orientation it is in the program you modelled it in. This means if you are not careful the models orientation in Substance Painter will make it difficult to light from the bottom.
As far as I have been able to find Substance Painter does not allow you to change the rotation of your model and it is incredibly frustrating. To change the orientation you have to switch over to the 3d software you modelled it in and then re-import your model to Substance Painter.
9. Separate Objects to Utilise Texture Maps
One difficulty you may have in Substance Painter is unless you group your objects before you import it will create a separate texture for each part in your model. You may plan to have several parts take up one UV, however your final textures export a texture for each part.
You can go in and combine your textures later using a program like Photoshop, but this is an extra step and can be tiresome when you have a lot of objects.
I’ve come across this problem particularly when I create several subtools in Zbrush and then take my model into Blender to do my UV;s
The UV I create in Blender places each object on a single plain however unless you combine each subtool to one object it imports into Substance Painter separately. This creates several textures when you export. Substance Painter does not give you an option to combine them.
Conclusion
Substance Painter is a fun program to use and while it can be a little tedious having to properly prepare your models I can guarantee a little preparation goes a long way.
I’m confident if you try these tips out you can dramatically increase the efficiency of your 3d pipeline, get great texturing results and overall improve the quality of your models.